
Building a do-it-yourself indoor putting green is an excellent way for golf enthusiasts to practice their putting skills at home while saving time and money.
Many golfers struggle to find the opportunity to visit a golf course or driving range regularly, making an indoor putting green a practical and convenient alternative.
This step-by-step guide will help you create a professional-quality putting green in your own space, eliminating guesswork by addressing common challenges such as selecting the right materials, ensuring a smooth surface, and optimizing the design for realistic play.
What You’ll Learn in This Guide:
- Choosing the Right Turf Material
- Preparing the Base for a Smooth Surface
- Measuring and Cutting the Turf
- Installing the Artificial Grass
- Creating a Realistic Ball Roll and Speed
- Adding Breaks and Slopes for a More Challenging Game
- Maintaining Your Indoor Putting Green
Choosing the Right Turf Material
The quality of your artificial grass will determine the realism of your putting green.
Look for premium artificial putting green turf that provides:
- A stimp rating similar to real greens (typically between 8-12 for home practice)
- Durable, high-density fibers to withstand frequent use
- Proper drainage properties to prevent moisture buildup indoors
- UV-resistant fibers to prevent fading and maintain longevity
- Low-pile height for a smooth and consistent putting experience
- Non-directional grass blades to ensure an even ball roll from all angles
There are different types of artificial putting green turf available:
- Nylon Turf – Extremely durable, resistant to wear and tear, and ideal for high-traffic areas, but can be more expensive.
- Polypropylene Turf – More affordable and commonly used for indoor putting greens, though it may require sand infill to maintain ball roll quality.
- Polyethylene Turf – Offers a natural look and feel but is best suited for outdoor applications due to its softer texture.
For high-quality artificial putting green turf, check out our putting greens solutions for premium options tailored to your needs.
For more insights on artificial turf longevity and maintenance, visit our blog: How Long Does Artificial Turf Last?.
Pro Tip: Avoid artificial turf designed for general landscaping, as it may not offer the right texture and ball roll for putting. Investing in premium putting green turf ensures a realistic practice experience.
Preparing the Base for a Smooth Surface
A level and smooth base is essential for a true ball roll.
Follow these steps to prepare the area:
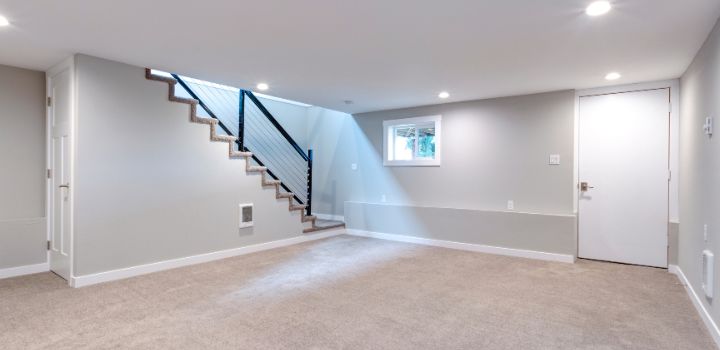
- Choose a location – A spare room, garage, basement, or even an unused office space can work well. Ensure there is enough room for an unrestricted putting stroke.
- Clear the floor – Remove any debris, carpets, or obstructions to create an even base.
- Assess the existing flooring – Concrete, hardwood, and tile floors can be used, but they may require additional underlay for optimal performance.
- Use a plywood or foam base – If placing turf on hardwood or tile floors, consider using a plywood or foam underlay to create a smooth, cushioned surface. This will also provide slight shock absorption and enhance ball roll consistency.
- Check for uneven spots – Use a leveling tool to ensure the surface is completely flat before installing the turf. Uneven surfaces can cause inconsistent putts and affect performance.
- Secure the base properly – If using a plywood base, fasten it securely to prevent shifting. If using foam, ensure it’s thick enough to prevent dips but not too soft to cause an unrealistic putting surface.
For expert assistance with base preparation and installation, visit our artificial grass installers page to connect with professionals.

Measuring and Cutting the Turf
Accurate measuring and cutting of the turf are crucial for achieving a seamless and professional-looking putting green.
- Measure the designated space – Use a measuring tape to determine the exact dimensions of your putting green area.
- Mark the turf – Using chalk or a washable marker, mark the measurements directly onto the backing of the artificial turf.
- Use a sharp utility knife – Carefully cut along the marked lines using a sharp utility knife to ensure clean and precise edges.
- Double-check alignment – Before final installation, lay the turf in place to check the fit and make any necessary adjustments.
Pro Tip: Always cut slightly larger than needed; trimming excess is easier than adding extra material later.
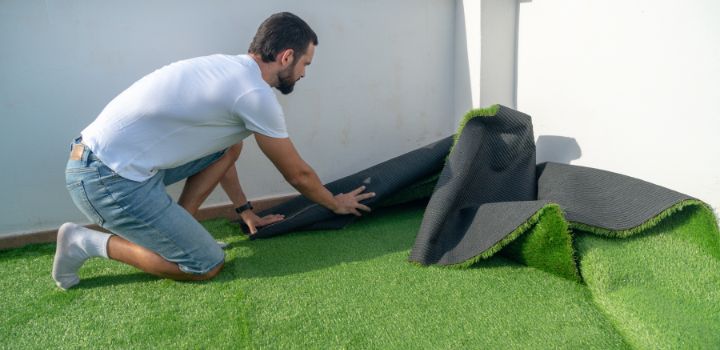
Installing the Artificial Grass
Proper installation of artificial grass is crucial for durability and a professional finish.
A well-installed putting green ensures an even playing surface, prevents movement, and extends the lifespan of the turf.
Follow these steps to secure your turf for a long-lasting, professional finish:
- Lay the turf flat and allow it to settle – Let the grass relax for a few hours to minimize creases. This helps prevent wrinkles and ensures a natural look.
- Secure the edges – Use double-sided carpet tape or indoor turf adhesive to keep the turf in place. Proper securing prevents shifting and maintains the integrity of the green over time.
- Brush the fibers – Use a soft bristle brush to help the grass fibers stand upright, mimicking a real putting green. Brushing also helps distribute infill evenly if applied, ensuring consistent ball roll and speed.
- Check for gaps or misalignment – After installation, inspect the edges and seams to ensure a seamless look. If needed, apply additional adhesive or use joining tape to create a smooth surface.
If you prefer a hassle-free installation, explore our DIY artificial grass solutions or let our professionals handle it for you with our Do-It-For-Me service.
Pro Tip: Properly installed artificial grass will not only enhance the aesthetic appeal but also provide a realistic and long-lasting putting experience.
This comprehensive guide provides detailed steps on installing artificial grass, covering pre-installation, base preparation, and securing the turf.
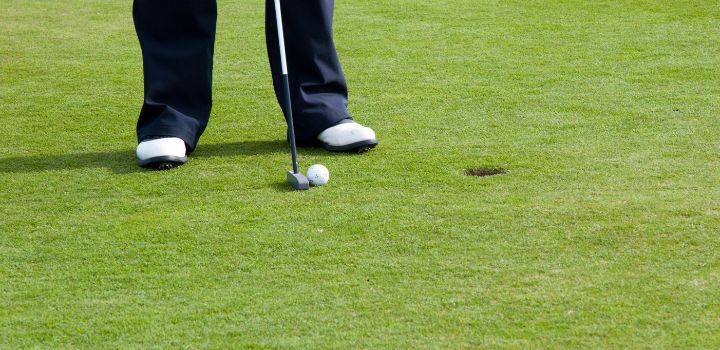
Creating a Realistic Ball Roll and Speed
Achieving a smooth and consistent ball roll is essential for an effective putting green experience.
Without proper adjustments, the turf may be too fast, too slow, or uneven, impacting the quality of your practice sessions.
Steps to Ensure Optimal Ball Roll and Speed:
- Use Sand Infill – Adding sand infill helps stabilize the turf fibers and control speed. The right amount of infill ensures the ball rolls naturally without unwanted friction.
- Roll the Surface with a Weighted Roller – A weighted roller compacts the turf and helps eliminate any air pockets, which improves ball roll consistency.
- Test the Stimp Speed – Perform several putts from different angles to evaluate the speed and smoothness of the surface.
- Brush the Turf Regularly – Regular brushing with a grooming brush maintains the fiber structure and prevents flattening, ensuring a true roll.
- Adjust as Needed – If the surface is too fast, add more infill to slow it down. If it’s too slow, brush the fibers upright or roll the surface more firmly.
Pro Tip: The firmer the surface, the faster the ball will roll. Adjust according to your preference to replicate real putting green conditions!
This article presents five practical putting exercises that golfers can perform daily to enhance their putting skills and boost on-course confidence.
Adding Breaks and Slopes for a More Challenging Game
Incorporating breaks and slopes into your indoor putting green will enhance your practice sessions by simulating real golf course conditions. Adding subtle elevations and curves makes putting more challenging and improves your ability to read greens.
How to Create Breaks and Slopes:
- Plan Your Design – Determine where you want to introduce breaks and slopes. Consider adding variations to different parts of your putting green to practice a variety of shots.
- Use Underlayment Materials – Foam pads, plywood, or rubber mats can be placed under the turf to create gentle inclines and breaks.
- Test Before Securing – Before permanently attaching the turf, test the slope by rolling balls to ensure the break behaves naturally.
- Make Adjustments – If a slope is too steep or not challenging enough, modify the underlayment until it meets your expectations.
- Secure the Turf Properly – Once satisfied with the break placement, secure the turf to maintain the contours without shifting over time.
Benefits of Adding Breaks and Slopes:
- Improves Green-Reading Skills – Helps you learn how to read putts on undulating surfaces.
- Enhances Ball Control – Trains you to control speed and direction effectively.
- Replicates Real Golf Course Conditions – Mimics the slopes you’d encounter in an actual game.
Pro Tip: Start with gentle breaks before incorporating more complex slopes to gradually build your skill level.
Maintaining Your Indoor Putting Green
Proper maintenance of your indoor putting green is essential to ensure longevity, preserve its playability, and maintain a smooth ball roll.
Neglecting regular upkeep can lead to surface inconsistencies, turf damage, and decreased performance over time.
Maintenance Tips:
- Vacuum or brush the surface weekly – This prevents dirt, dust, and debris from accumulating, which can impact ball roll and overall turf appearance.
- Check for adhesive wear – Over time, the adhesive securing the turf may weaken. Inspect the edges and seams regularly and re-secure any loose sections to maintain a seamless surface.
- Avoid excessive moisture – Indoor environments may still be subject to humidity and spills. Moisture can weaken adhesives, lead to mold growth, and affect the durability of the turf. Ensure proper ventilation and wipe up any spills immediately.
- Brush the turf fibers regularly – Frequent brushing helps the fibers remain upright, preserving the realistic feel and consistent ball movement.
- Monitor and redistribute infill if applicable – If your putting green includes infill, ensure that it remains evenly distributed to prevent inconsistencies in ball speed and roll.
- Use a protective cover when not in use – If possible, cover the putting green when not in use to protect it from dust, spills, and potential damage.
For high-quality artificial grass maintenance products and expert tips, visit our lawn care solutions page.
Pro Tip: Store a small brush or roller nearby to quickly smooth the surface after each practice session.
For tips on preventing drainage issues with artificial turf, check out our blog: Artificial Grass Drainage Problems and Fixes.
Final Thoughts
A do-it-yourself indoor putting green is a fantastic addition to any home, providing year-round practice opportunities for golf enthusiasts. By following this guide, you can build a high-quality putting green tailored to your space and budget. If you need expert advice or premium artificial grass products, contact Buy-Grass today for assistance with all your artificial grass and landscaping needs!