
- Assessing concrete condition and surface requirements
- Selecting compatible turf products and adhesives
- Concrete cleaning, priming, and moisture testing
- Installing underlayments and drainage solutions
- Precise turf cutting, seaming, and edge anchoring
- Proper infill application for stability and cushioning
- Final grooming and maintenance tips for concrete applications
1. Assessing Your Concrete Surface
Before ordering turf, inspect the concrete slab or deck for:- Cracks and spalling: Minor cracks can be filled; large damage requires patching.
- Levelness: Ensure the surface is flat; use self-leveling compound where needed.
- Moisture: Conduct a calcium chloride test to confirm moisture content is below 3 lbs/1,000 ft²/24 hr.
- Slope: A 1–2% slope towards drains prevents standing water.
2. Choosing the Right Turf & Accessories
Not all artificial grasses perform equally on hard surfaces. Select turf with:- Non-slip backing: Prevents shifting on smooth concrete.
- Perforations: Promotes drainage of rinse water or spills.
- UV-stable fibers: Resists fading in exposed areas.
- Medium pile height (0.75–1.5 in): Easy to clean and minimizes wind uplift.
- Acrylic or polyurethane concrete primer
- High-strength outdoor turf adhesive
- Shock-absorbent underlay/foam pad (optional for walkways or play areas)
- Galvanized turf staples or mechanical fasteners
- Quality seam tape and roller
- Silica sand or rubber crumb infill
3. Preparing & Priming the Concrete
Proper surface prep ensures strong adhesion:- Clean thoroughly: Power-wash to remove dirt, oil, and debris; allow full drying (24–48 hours).
- Repair defects: Fill cracks and spalls with a two-part concrete patch; sand smooth.
- Test moisture: Use moisture meter or calcium chloride test; if high, install a vapor barrier membrane before primer.
- Apply primer: Roll or brush on a thin coat of concrete primer; let cure per manufacturer (2–4 hours).
4. Installing Underlayments & Drainage
On exposed balconies and patios, a thin shock pad improves comfort and provides additional drainage:- Lay foam underlay: Roll out an approved closed-cell foam pad; seam tape edges.
- Trim to fit: Cut to perimeter with a utility knife, leaving a ¼-inch gap for expansion.
- Drainage channels: For heavy rain areas, place plastic drainage mats beneath underlay to channel water to drains.
5. Measuring, Cutting & Laying the Turf
Precision here prevents gaps and waste:- Measure area: Record exact length and width; add 2–4 inches for trimming.
- Unroll turf: Lay rolls with pile facing the same direction; avoid tucking under soffits.
- Mark cuts: Use chalk to trace perimeter; incorporate door clearances and abrupt transitions.
- Cut turf: Use a fresh blade and straightedge for clean edges; slice slowly to avoid jagged cuts.
6. Seaming & Securing Edges
Proper seaming delivers a seamless look:- Align blades: Ensure fibers of adjoining pieces point in the same direction.
- Seam tape & adhesive: Lay tape under seams; spread adhesive above per instructions; roll the seam with a hand roller.
- Edge fastening: Use galvanized staples every 6 inches along perimeter or drill concrete anchors with washers for a mechanical hold.
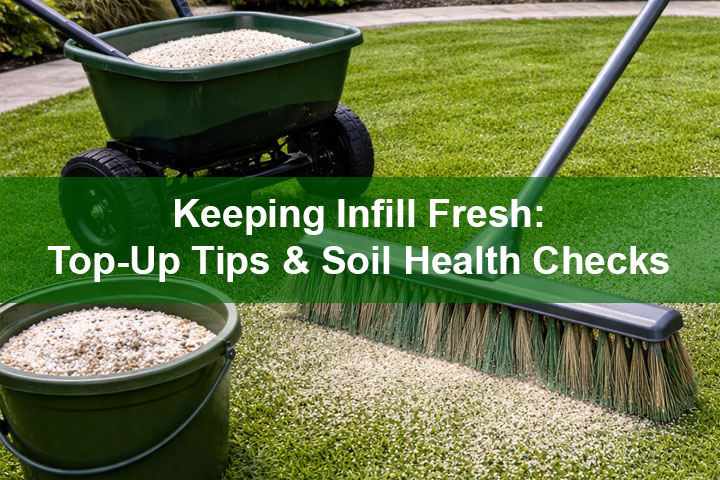
7. Applying & Brushing Infill
Infill stabilizes fibers and adds cushioning:- Spread infill: Use a drop spreader to apply silica sand or rubber crumb at recommended rates (1–2 lbs/sq ft).
- Power broom: Brush in one direction, then perpendicular, to settle infill between blades evenly.
- Repeat passes: Continue until blades stand upright and infill is fully integrated.
8. Final Grooming & Inspection
Ensure longevity and performance by:- Vacuum or blow off dust: Remove loose debris and trimming scraps.
- Roll turf: Use a weighted roller along seams and edges to lock adhesive and staples.
- Check drainage: Simulate rain with a hose to confirm proper runoff.
- Test firmness: Walk across the surface; infill should prevent hard spots and turf should stay anchored.
9. Maintenance Tips for Concrete-Topped Turf
Unlike turf over soil, concrete installations require less weed control but benefit from:- Regular rinsing: Hose down monthly to clear dust and pollen.
- Seasonal brushing: Lift fibers and redistribute infill every 3–6 months.
- Spot cleaning: Wipe spills with mild soap and water; avoid harsh acids or solvents.
- Seam inspection: Check edges and seams annually; reapply adhesive where needed.
Ready to Upgrade Your Concrete Surface?
Contact Buy-Grass for custom turf solutions and professional concrete installations.