Artificial Grass Repair: DIY Fixes for Patches and Seams
The 60-Second Answer
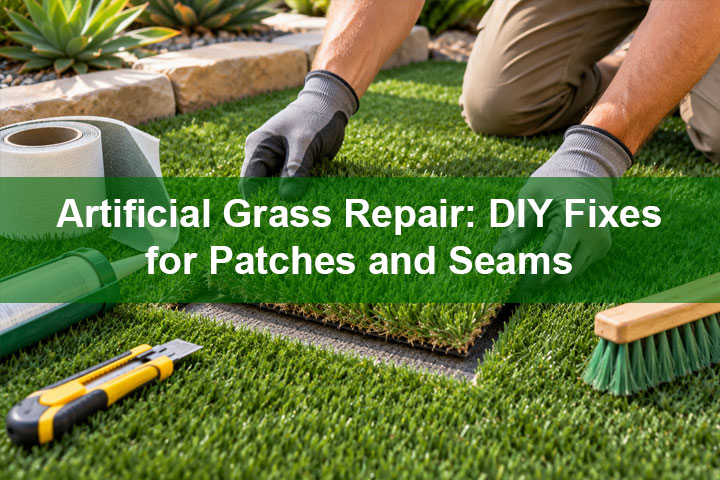
Most small artificial grass repairs can be completed without replacing the entire lawn. A loose seam can sometimes be reattached, while burns, cuts, and holes can often be repaired by removing the damaged area and installing a matching turf patch.
Successful artificial grass repair depends on three things: matching the existing turf, keeping the grass fibers aligned, and using the correct seaming materials.
Our recommendation: Tackle small, isolated repairs yourself if you have matching leftover turf and the damage does not involve the base. Hire a professional for extensive seam failures, drainage problems, or damage that keeps returning.
First, Identify What Actually Needs Repair
Before reaching for a utility knife or adhesive, inspect the damage carefully. Artificial grass problems that look similar on the surface can require very different repairs.
A small burn may affect only the tips of the fibers. A deeper burn may have melted the backing underneath. A visible seam might simply need rebonding—or it could indicate shifting in the base beneath the turf.
The first question should be: Is this cosmetic damage, a failed connection, or a problem with the installation itself?
That distinction helps you avoid spending money on a repair that will fail again.
At a Glance: Can You Fix It Yourself?
| Type of Damage | Typical Repair | DIY Difficulty | Our Recommendation |
|---|---|---|---|
| Flattened fibers | Brush and groom | Easy | DIY first |
| Minor melted tips | Careful trimming | Easy to moderate | DIY if backing is intact |
| Small hole or burn | Replacement patch | Moderate | DIY with matching turf |
| Short separated seam | Clean and rebond | Moderate | DIY if backing and tape are sound |
| Large seam separation | Rebuild seam | Advanced | Professional preferred |
| Wrinkles or sinking areas | Diagnose base and securement | Advanced | Professional assessment |
Buy-Grass assessment: A patch is often worthwhile when the damage is limited to a small area and the surrounding turf remains healthy. Widespread deterioration is a different problem and may justify replacing a larger section.
Tools and Materials for Artificial Grass Repair
Most minor repairs require only a few specialized materials. However, the correct adhesive and tape matter more than having an expensive tool collection.
- Sharp utility knife with replacement blades
- Matching replacement turf
- Synthetic turf seaming tape
- Manufacturer-approved turf adhesive
- Putty knife or appropriate adhesive applicator
- Measuring tape and straightedge
- Painter's tape for holding fibers aside
- Clean shop vacuum suitable for collecting infill
- Weights or sandbags
- Synthetic-bristle turf brush
- Matching replacement infill if needed
- Work gloves and appropriate eye protection
Use materials that are compatible with your particular turf and installation system. A product designed for artificial grass seams is preferable to choosing a general-purpose household glue based on convenience alone.
Some adhesives also have specific ventilation, moisture, surface preparation, and curing requirements. Always follow their instructions.
How to Patch a Burn, Hole, or Torn Section
For a small damaged area, the most reliable repair is often to remove the affected turf and replace it with a matching piece.
Step 1: Find a Matching Piece of Turf
Ideally, use a leftover offcut from the original installation. It should match the existing product's color, blade shape, pile height, and backing.
If you don't have a spare piece, contact the original installer or manufacturer before purchasing a visually similar product.
Remember that older turf may have weathered or faded. Even an identical new product can be more noticeable when installed in the center of an established lawn.
Step 2: Remove Infill and Mark the Damage
Gently remove loose infill from the repair area so you can clearly see the backing and tuft rows.
Mark a repair boundary that extends into sound, undamaged material. The goal is to create clean edges without cutting unnecessary turf.
Cutting between tuft rows whenever practical helps preserve the surrounding blades.
Step 3: Cut Out the Damaged Area
Use a sharp utility knife to cut carefully through the backing.
Work from the underside when accessible and avoid damaging nearby fibers, irrigation lines, drainage components, or the prepared base.
Remove the damaged piece and inspect the exposed area. If the base is soft, uneven, or contaminated, correct that problem before installing a new patch.
Step 4: Match the Blade Direction
This is one of the most important steps in the entire repair.
Artificial grass fibers usually have a directional lean, sometimes called the grain.
Place the replacement piece beside the opening and rotate it until the blades lean in the same direction as the surrounding turf.
When the grain runs in the opposite direction, the patch can appear noticeably darker or lighter, even when the product is identical.
Step 5: Dry-Fit the Patch
Cut the replacement piece to fit the opening, then test its position before applying adhesive.
Check that the edges meet evenly without overlapping or creating large gaps. Keep the fibers from both sides from becoming trapped underneath the backing.
Do not force an oversized patch into the opening. That can create wrinkles or raised edges.
Step 6: Install Seaming Tape and Adhesive
For a typical loose-laid turf installation over a prepared base, place compatible seaming tape beneath the perimeter of the opening so it supports both the existing turf and the replacement patch.
Apply the recommended adhesive according to the manufacturer's instructions. Protect the exposed fibers from accidental glue contact.
Some adhered-to-concrete installations require a different method, so confirm the original installation type first.
Step 7: Secure the Patch While It Cures
Position the patch carefully, press the bonded edges together, and apply evenly distributed weight as directed by the adhesive manufacturer.
Keep people and pets away from the repair until the adhesive reaches the required cure condition.
Do not assume all turf adhesives cure in the same amount of time.
Step 8: Restore Infill and Groom the Fibers
Once the adhesive has cured, replace the required infill and use a synthetic-bristle brush to blend the fibers.
A properly fitted patch should sit level with the surrounding lawn, although some color difference may remain.
Buy-Grass Pro Tip
Before discarding installation scraps, save a clearly labeled piece of your original turf. Include the manufacturer, product name, color, and installation date. Matching replacement material may be difficult to find several years later.
How to Repair a Separated Artificial Grass Seam
A visible seam does not always mean the turf must be replaced. If the backing remains sound and the two panels still align properly, rebonding may solve the problem.
Inspect the Separation
First, determine whether the existing adhesive failed, the seaming tape deteriorated, or the turf panels shifted apart.
If there is a wide gap, torn backing, or movement in the base, simply adding adhesive may not produce a lasting repair.
Clean the Seam Thoroughly
Remove loose infill and debris from the separated area. The bonding surfaces must be clean and prepared according to the adhesive instructions.
Do not apply new glue directly over loose sand, dirt, or failed adhesive without proper preparation.
Rebond the Turf
If the existing seaming tape is reusable and the manufacturer permits rebonding, apply the recommended adhesive to the prepared surfaces.
If the tape is torn or insufficient, replace it with an appropriate product before joining the turf panels.
Carefully close the seam, keep grass blades out of the adhesive, and weight the repair during curing.
Restore the Surface
After curing, replace infill and brush the fibers to help conceal the joint.
If the seam opens again, stop repeating the same repair. Investigate the underlying cause, which may include base movement, poor original installation, or an unsuitable joining method.
Why Some Turf Repairs Remain Visible
Even a structurally sound patch can be noticeable. That does not necessarily mean the installer made a mistake.
Several factors affect appearance:
- Color differences: Older fibers may have changed appearance through weathering or dirt accumulation.
- Blade direction: Opposing grain makes adjacent turf sections reflect light differently.
- Pile height: A new patch may stand taller than surrounding worn fibers.
- Infill levels: Uneven infill changes fiber support and surface height.
- Seam alignment: Poorly matched tuft rows can make the repair boundary more visible.
This is why a small repair in a prominent front yard may demand more precision than a similar patch in a side yard or dog run.
Repair or Replace? Making the Financial Decision
Before paying for a professional repair, compare the likely repair result against the cost of replacing the affected section.
| Condition | Repair May Make Sense | Replacement May Be Better |
|---|---|---|
| One isolated burn | Yes, with matching turf | Rarely necessary |
| Short open seam | Yes, if backing is intact | If panels are damaged or distorted |
| Many flattened areas | Try grooming first | If fibers no longer recover |
| Widespread heat damage | Only if localized sections can be isolated | Often worth evaluating |
| Repeated sinking or wrinkles | Only after base correction | If broader reconstruction is needed |
Our preference is to repair isolated damage when the surrounding product still has substantial useful life. However, we would not repeatedly patch a lawn experiencing widespread deterioration simply to delay an inevitable replacement.
Fix the Cause Before Repairing the Turf
Some types of artificial grass damage will return unless the underlying cause is addressed.
Reflected Sunlight from Windows
Concentrated sunlight reflected by certain windows can melt synthetic turf fibers. Replacing the damaged section without correcting the reflection may lead to another burn.
Potential solutions involve appropriate window treatments or landscape changes, evaluated with the window manufacturer and relevant professionals.
Fire Pits and Grills
Artificial grass fibers are thermoplastic and can melt when exposed to excessive heat, embers, or hot equipment.
Use properly designed noncombustible hardscape areas around fire features and maintain manufacturer-required clearances.
Pets Digging at Edges
If a dog repeatedly lifts or digs along a turf edge, replacing the damaged fibers will not solve an insecure boundary.
Consider better edge restraint and changes to the surrounding landscape.
Underlying Base Movement
Low spots, ripples, and recurring seam separations can indicate poor compaction, erosion, or settling.
In these cases, the base may need repair before the turf can be restored successfully.
Things We Wish Every Homeowner Knew
1. The best repair material is often already in your garage.
Leftover turf from the original installation can be more useful than a new product that looks almost—but not quite—the same.
2. Blade direction can make or break a patch.
Matching the product is only half the challenge. A patch installed against the original grain can remain obvious.
3. More adhesive does not mean a stronger repair.
Excess adhesive can contaminate fibers and create visible hard spots. Follow the bonding system's application instructions.
4. A failed seam may be a symptom, not the problem.
When seams repeatedly separate, inspect the base and original installation rather than simply adding more glue.
5. A perfect cosmetic match is not always possible.
A structurally successful repair in an older lawn may still show differences in color or texture.
Common DIY Artificial Grass Repair Mistakes
Cutting Through the Grass Fibers
Cutting carelessly from the top can shorten surrounding blades and create an obvious repair outline.
Using the Wrong Adhesive
Not every construction adhesive is suitable for turf backing, moisture exposure, and temperature changes.
Failing to Clean the Bonding Surface
Loose infill, dirt, and old adhesive can prevent proper bonding.
Walking on the Repair Too Soon
Premature foot traffic can disturb the seam before the adhesive has cured.
Ignoring Warranty Coverage
A damaged seam may be covered by an installation warranty. Contact the original installer before attempting repairs that could complicate a claim.
Before You Buy Repair Materials
Use this checklist before starting:
- Have I identified why the turf was damaged?
- Is the backing still structurally sound?
- Is the underlying base flat and stable?
- Do I have matching replacement turf?
- Can I match the original blade direction?
- Is the seam tape compatible with my installation?
- Does the adhesive manufacturer approve this application?
- Can I keep people and pets off the repair while it cures?
- Could my original installation warranty cover the damage?
Our Recommendation
If we were repairing a residential artificial lawn, we would begin with the smallest effective fix.
For flattened fibers, we would try careful grooming. For a small burn or tear, we would use matching leftover turf and a manufacturer-approved patching method. For a short seam separation, we would inspect the tape and backing before attempting rebonding.
We would hire an experienced installer when the damage involves the base, widespread seam failure, a high-visibility repair requiring an exceptionally close match, or repeated problems that suggest an underlying construction issue.
Above all, we would repair the cause of the damage before repairing the visible surface.
The goal of artificial grass repair isn't simply to make the lawn look better today. It's to restore a surface that continues performing well tomorrow.
Continue Learning
- Artificial Grass Blade Shapes: Choosing the Right Turf
- Pile Height vs. Performance
- Artificial Grass Face Weight Explained
- Synthetic Grass Warehouse: Turf Repair Techniques
- Synthetic Grass Warehouse: Seam Repair Guidance
Repairing Your Turf—or Planning a Replacement?
Before spending money on materials, determine whether your artificial lawn needs a small repair, a professional correction, or replacement of a larger section.
At Buy-Grass.com, our independent buying guides help homeowners understand turf materials, installation methods, maintenance, and long-term ownership decisions.
Make the repair that solves the problem, not just the one that hides it.